Beginning Middle And End Of A Story For Kindergarten – With the Beginning Middle End graphic organizer, students can plan their stories and create an outline before writing. Learn about the types and uses of graphic organizers with our examples of BME graphic organizers. Use our templates to create your own graphic organizer on .
The Beginning Center graphic organizer is a text planning tool that helps you summarize text sections and visualize the beginning, middle, and end of any narrative text. This improves students’ understanding of the text and helps them understand the structure of the writing. Students can identify story elements and logically organize their ideas using the BME graphic organizer.
Contents
Beginning Middle And End Of A Story For Kindergarten

You can create a “begin-in-the-middle” graphic organizer by summarizing a beginning, middle, and end. The BME graphic organizer is easy to use because no matter how complex your story text is, it will start at a certain point and end at a certain point. However, you can change the format of the graphic organizer depending on your region. Our beginner and intermediate graphic organizer examples walk you through the different layouts and uses of these charts.
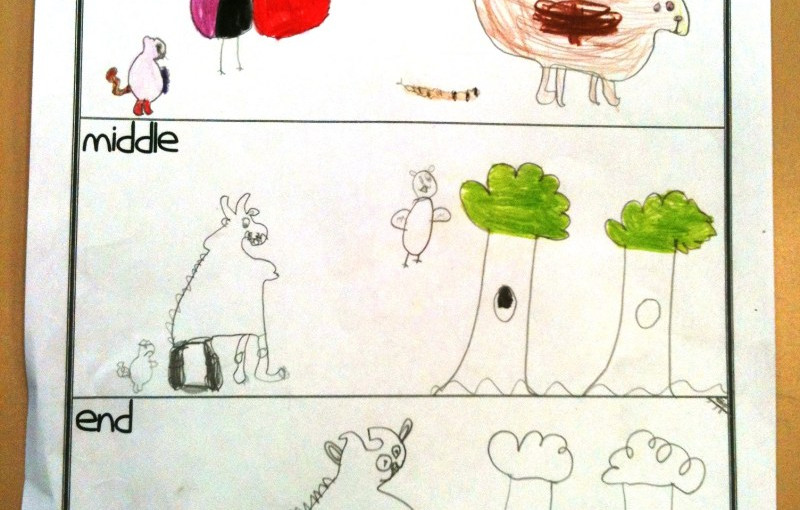
Write A Five Sentences Short Story About The Picture Belowtittle:beginning: Middle:ending:moral/lesson Of The
The Beginning Intermediate Graphic Organizer is a great tool to help students improve their writing skills. In the introductory part, a story or piece begins, and students can describe their text and introduce different elements of the story. In the middle section, students can explain their text by providing details and explaining how the story develops. The last section is where students finish their writing and summarize their stories. There are also blank spaces on the sides where students can draw pictures to better explain their text.
A beginning, middle, and end graphic organizer supports creative writing by helping students visualize their stories or narrative text. Using this reading/writing tool, students can generate ideas and express their thoughts about the story. Students can use text and pictures to summarize the story. The BME graphic organizer has three sections. In the first part, students define the topic. They explain their entry in the middle part and visualize the conclusion in the final part.
Students can outline their notes and organize their ideas with this graphic organizer PDF for beginners and intermediate students. Teachers also use this tool to summarize stories for their students and tell them about the beginning, middle, and end of a story. This helps them think through the story and understand its key elements. The template in this example is a PDF outline with a simple format and wide spaces where students can explain their story in many words. They can also use a picture to summarize their story.
You can use the free beginning and ending graphic organizer template to write a creative story and summarize its key elements. The format of the BME graphic organizer in this example differs from its standard layout. The page is divided vertically into three parts. In the first part, students write about their characters, the chronology of the story, and key words. The details of what happens in the story can be found in the second part of the template. In the last part, students finish their story by summarizing what happens at the end.
Free & Printable Story Map Templates [pdf, Word, Ppt]
The First Grade Graphic Organizer Template for Beginning and Middle Grades is a great tool to help younger students improve their reading and writing skills and summarize their story in a few sentences. Students write their names, the titles of the stories, and the authors’ names at the top. They also give the names of characters and supporting characters in their story. After writing where the story takes place and its timeline, they begin writing the beginning of their story in the beginning box. Students summarize the details and plot in the middle box and wrap it in the last box.
Teachers use the Kindergarten with Middle School Graphic Organizer to teach elementary school children how to write stories. They are given a graphic organizer template and asked to write about their day or create a new story. The template has two parts, one with the backstory and timeline, and the other with the beginning, middle, and end of the story. Students write about characters, time and place, and describe where the story took place. In the second part, students summarize the beginning of the story, the events that take place, and how it ends.
A graphic organizer at the beginning and end with lines is best for writing a story because students have enough space to write a complete summary. The template in this example contains two input sections. In the first part, students write about the chronology, background and characters of their story. In the second part, students logically record the key elements of the story and related themes. They summarize the beginning of their story, explain their story, and make a satisfying conclusion.

Students with good reading and writing skills are better able to understand the text of a story and generate creative ideas for writing their stories. Teachers use the middle elementary graphic organizer worksheets to assign assignments and tests to their students. The template in this example is a BME graphic organizer in the shape of a hut. At the top, students write the setting and characters of their story. They then write down any problems they encounter in the story with their solutions. They summarize the beginning, middle and end of the story.
Identifying Parts Of A Story Worksheet
The story should have a plot and characters, as well as a beginning, middle and end, as can be seen from the retelling task. The story starts from the beginning. An author grabs the reader’s attention with a great opening line, a comprehensive description of a character or place, or an insight into a story’s problem, dilemma, or theme. The mood of the reader will be set at the beginning. After a great start, you want to keep reading. The task of writing a retelling shows how a plot must have a very clear beginning, middle, and end—along with all the necessary details and tension known as exposition—so that the reader can follow it from beginning to end and understand the action. .
The Beginner Intermediate Graphic Organizer is a great tool for writing narratives, summarizing stories, and helping students improve their writing and reading skills. Writing is easier, but creating a graphic organizer is a challenge with the right charting tool. Online is the best online graphic organizer builder with a strong template community and over three hundred chart options. It also comes with a symbol library with thousands of symbols that you can use to create a graphic organizer from scratch.
With the beginner’s graphic organizer in the middle, you can draw stories and create plans for writing a story. Teachers use it to tell stories, encourage creative writing, and improve students’ reading and writing skills. It helps them understand complex works and key elements of the story. You can easily create a BME graphic organizer online. It provides you with professional templates that you can modify and create a new graphic organizer with just a few clicks. It also supports multiple document formats and a full symbol library. Check out the template community for more graphic organizer templates. Learning the beginning, middle and end of fiction can be fun if you use Wiener dog! Lately we’ve been working on a beginning, middle, and end. I told the children that when they read the story, I want them to think about which parts of the story are at the beginning, which are in the middle, and which are at the end. I showed them a picture of an anchovy and told them that the head and tail are short, and the beginning and end of the story. The dog’s body was long, like in the center of the story.
After reading the entire fairy tale, I invited the children to think about what happened at the beginning of the fairy tale. I let them go back and talk to my elbow partner. As they spoke, I “listened” to see what they were saying. I called them back and quickly summarized what I heard from them. I repeated this process for the middle and end of the story.
Free Printable Beginning Middle End Worksheets For Students
Later that day we used interactive writing and wrote what happened at the beginning, middle and end. When I called on the children to help me write the table, each child had a sheet to fill out.
This is an updated version. I also added a page without lines. It’s a great way for non-text creators to record the beginning, middle, and end of a story. This is from Reading Is Fun.
In the third session, I read each chapter aloud to the children. Each time I asked them if it was the beginning, middle or end of the story. Each time we returned to the text to find evidence to support our answers.

After reading each part, I ask the children to put their hands on their heads if they thought it was the beginning of the story, on their stomachs if they thought it was the middle of the story, and on their “tails” if they thought it was. that was the end of the story.
Guidelines For Submitting A Yes Story!
After that we gave
Short story with beginning middle and end, beginning middle and end of story, beginning middle end graphic organizer kindergarten, beginning math for kindergarten, beginning reading for kindergarten, beginning readers for kindergarten, story map beginning middle end, story writing template beginning middle end, story beginning middle and end, beginning middle and end, beginning middle and end of a story for kindergarten, beginning middle and end of a story worksheets